




HomeMi CasaTutorialsInteriors etcMurals and ArtworkPainted Furniture

Thursday, September 18, 2014

TUSCAN KITCHEN CABINETS HAND PAINTED SPECIAL FINISH

TUSCAN KITCHEN CABINETS 

HAND PAINTED SPECIAL FINISH


The two white distressed chandeliers in the post before this one are in this kitchen with the new off white colors that I will show you in the next post.
But, I wanted to show you the "before" pictures.
This is the tuscan special finish I painted for my client several years ago.
The cabinets were pickled/white washed oak.  She showed me the look she wanted, I made samples and she approved.
I loved the finish on these cabinets!


I used a gel stain and lightly distressed the finish.
My camera flash made them look kind of orangey.  In real life, they were a little more brown.

SEPTEMBER 20, 2014
THIS IS THE DAY AFTER I POSTED THIS KITCHEN.
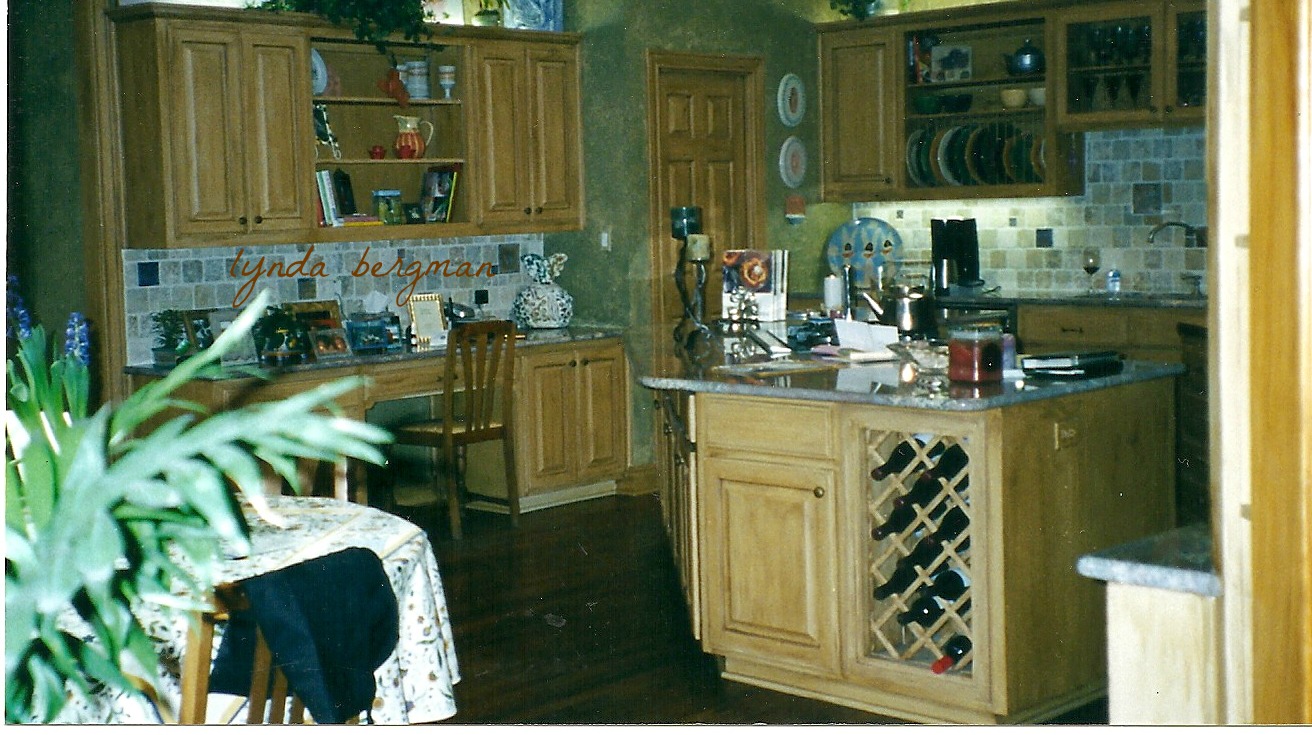

I just found a picture that is closer to the actual color of the cabinets back then.  Not sure what happened with my camera, but this is better.  I do love the technique that I used, just not those orangey overexposed shots.
Also, I found this picture of her wine rack that I painted.  In her new kitchen, she had a cabinet door and drawer removed and had the carpenter build this custom sized wine rack. 


 I brought it home with me and painted it here.  Thank goodness, I was able to do that.  I've painted a lot of wine and plate racks and had to paint them in place and that is NOT easy!!
NOW, back to the original post:


This is such a beautiful, very large kitchen!  It wraps around in three sections.  I'm showing you the middle section.


I don't usually get to see and take pictures when everything is neat and back to normal.
Glad I got to take these pictures, though.
Because a few months ago, she called and said she was ready for a change.  She said she still loved this tuscan finish, but she was ready to have EVERYTHING painted in very light colors.
Before, she had me paint, texture and faux most of the walls in her new home in dark colors.  
Because of my schedule, I could only do the kitchen cabinets, this time.  She wanted the lighter colors and a little bit of distressing, again.  It took me about two weeks to do all of those layers.
Most of the finishes I paint take from 4 to 7 different layers.  That means I have to hand touch and paint every inch of those cabinets 4 to 7 times.  
It is a chore, but I do love what I do.
Especially when I'm finished and the client is happy.

Tuesday, September 2, 2014

IT'S ALMOST SEPTEMBER 11. ARE YOU PREPARED, JUST IN CASE?

Not to be paranoid, but I'm going to be prepared.
It's almost September 11, and I remember how scared and confused I was back then on 
September 11, 2001.
I eat mostly fresh and frozen vegetables, fruits, nuts, etc.  Rarely do I eat anything out of a can, except tuna.
But starting in 2001, I began storing a good supply of canned goods and non perishable food in the back of my pantry, just in case.
As I'm putting the cans in the pantry, I always use a marker to write the date on them.  After a few months, I give all the food to someone before the expiration dates and start buying and stocking my pantry, again.
Oh, and a good supply of water and bathroom tissue are very important items on that list of supplies. 
If something were to happen (ever) I think we would only be isolated for a very few days and I feel that I am prepared.
Are you?
Do you even think about it?

Friday, August 29, 2014

Wednesday, August 27, 2014

A STURDY TABLE FOR MY ROUTER TABLE

My New Router Table

My carpenter neighbor built me a sturdy table to hold my router table.


It is soooo easy to use now.
He made it just my height.
It stays in place when I'm pushing on the boards that I'm cutting.
See that little silver latch on the front?  That is to open and lean the table back so I can replace the router bit. 
Isn't this nice!!


This is the bit that I used for these boards. I really like this edge.


That shelf is to hold my shop vac to catch all of the saw dust and it really does catch it all.  Standing so close and leaning over the table, I didn't have to breathe in any of the dust.  He even custom made a little pvc attachment so my vacuum hose would fit the router table outlet.
See those two rollers on the bottom?


See the posts on this side?
He thought of everything.
On this side, I just lift the table and pull and the rollers on the other side let it roll so I can move it wherever I need to.
Being a carpenter, he thought of everything that might be a problem for me using my router.
So easy! 
 And, so nice!
Thank you, Clint!!

Sunday, August 24, 2014

HUGE KITCHEN ISLAND & FRENCH "LA PATISSERIE" DISTRESSED PANTRY DOOR THAT I PAINTED

FRENCH "LA PATISSERIE" DISTRESSED PANTRY DOOR THAT I PAINTED

Ok, here is the island in that huge kitchen in the huge home I've been showing you.
I asked permission to take a picture of this kitchen island, but I did not paint it.  My client got all of her kitchen cabinets, island included, from a factory.


The walls and cabinets of this kitchen are so high that she has a library ladder to get to the top cabinets.
How cool is that!!


This is a close up picture of the finish on the island.
Most of us could do this finish, couldn't we??
And, I always worry about my work chipping, but this factory built island had some chips on it and I'm guessing most of the chips were from delivery and installation.
My client asked if I would touch up the chips.  I knew what to do and was very glad to do it for her.


This is a very tall pantry door they asked me to paint when the house was being built.  They brought it to my studio.  It was a white door and she wanted me to paint it very distressed and to look like she had found it in an old pastry or cake shop.  I designed and painted on the glass.  After her approval, of course.  The red you see is the color of her pantry walls.


I took these pictures in a hallway and it was difficult to get the whole door in one picture.

HERE ARE THE LINKS TO THE POSTS WHEN I WAS PAINTING THIS DOOR AND THE GLASS.  I WAS POSTING MY WORK AS I PAINTED EACH PART OF THE DOOR

SEE THE PROGRESS:


Monday, August 18, 2014

BEAUTIFUL MANTEL I PAINTED TO LOOK OLD & DISTRESSED


Back to the home where I repaired the black and gold powder room chest two posts back.


This is the mantel that I painted to look distressed and very old.
I have lots of really good furniture finish samples in my studio and my client and her decorator came by and picked out a finish and the colors they wanted on the mantel.
AMAZING!!  I love that wallpaper!


My favorite thing is to make things look old!


Isn't this just fabulous???  That wallpaper is glorious and that mantel is so tall I had to stand on a ladder to paint the top.  Of course, this picture is when I first finished the painting and before the client moved in.


When I started, it was unfinished wood.  
Whoever designed this mantel is a master!! 
I just think it is sooo beautiful!!
Next, I'll show you the kitchen island and then the pantry door I painted to look like it came out of an old pastry or cake shop in Paris.  (that's what she said!)

Friday, August 15, 2014

HOW TO MAKE A RIBBON ROSE IN LESS THAN A MINUTE

This is a great tutorial on how to make ribbon roses in less than one minute.
I'm guessing that means AFTER you learn how.
The instructions say you need 75 cm of ribbon.
I think that's about 2 ft. 5 inches of ribbon.


I can think of lots of ways to use these beautiful ribbon roses.