HomeMi CasaTutorialsInteriors etcMurals and ArtworkPainted Furniture

Thursday, September 6, 2018

PAINTING HAYLEY & JUSTIN'S KITCHEN CABINETS & FRONT DOOR.

PAINTING HAYLEY & JUSTIN'S KITCHEN CABINETS & FRONT DOOR 

Hayley and Justin wanted to make changes to their kitchen.
They asked me to paint all of the cabinets.  
Their home is one of my favorite floor plans, ever!  I love the layout.
  There is a wonderful little bridge that leads from the street to their front door.
Very tall lavender crepe myrtles, full of blooms.
drape over the painted black bridge and around the home.
Hayley has lots of windows that overlook her back yard.  There was so much light and reflection in the kitchen that I couldn't get pictures of the exact colors that I painted.
The dark grayish blue in the sample below is the actual color of her kitchen island.
SW6251 Outerspace ~ Island paint color
70BG 19/071 Mystery Sound ~ Devoe Paint ~ Color of kitchen cabinets.
I used semi-gloss paint.
The color combination was really nice.
If you like grays and gray blue colors, check out these colors.
 The wide opening on the left was a small door opening.
That's one of the major changes to the kitchen that made a huge difference.
It opens to the dining room.
This is where that wall was.  (I'm standing in the kitchen.)
Before, you could not see the dining room from the kitchen. 
Much more light in both rooms from all of  the windows.
Doesn't it look great, now!
Look at the light fixtures in the dining room and kitchen.
This stained glass window is high in the living room.  The wall around it is off white.
Hayley's decorator found this antique scale.  It was bright orange.
She wanted to put it on Hayley's kitchen island and asked me to paint it white.
The bright white looks really sharp on the dark island.
Hayley found these huge copper light fixtures for her front porch.
She wanted her front door to be purple, so her decorator found this dark grayish purple.
This color is BM AF-645 Chambourd
A perfect color for more of the wonderful stained glass in this home and the copper lights.
The bridge, painted black, to her front door.
Very tall lavender crepe myrtles drape over and around the bridge.
Front door (before).
Kitchen cabinets (before)
See the ceiling beam above the window?  She asked me to paint it to look like wood.
Will show the beam to you in the next blog post.
Such a happy home!
Thank you, Hayley, for asking me to paint for you.
I loved working in your beautiful home!!
~
See the painted ceiling beam up by the window.
Here is a link to the way it looks now, after I painted it to look like wood:
PAINTING A WHITE CEILING BEAM TO LOOK LIKE A DARK WOOD BEAM

Sunday, August 19, 2018

PAINTING VENT HOOD CORBELS & ROPE TRIM TO MATCH ANNA & DIEGO'S PANTRY DOOR

PAINTING VENT HOOD CORBELS & ROPE TRIM TO MATCH ANNA & DIEGO'S PANTRY DOOR

In the previous post I showed you Anna and Diego's pantry door.  
It was a white door and they asked me to paint and distress it to look really old.
Then, they agreed it would look good to paint the vent hood corbels like the pantry door.
Anna and Diego love decorating their beautiful home and are have very good ideas.  They decided they wanted to add a rope trim to the vent hood and paint it like the pantry door, too.
It was such a good idea!  Diego is good at carpentry.  He mitered and added the rope trim.
(I think anybody who is good at mitering is a genius :)
This is a close up of the distressed/old finish I painted on the pantry door.  Anna found this antique door knob, cleaned it and it looks just wonderful! on the dark door.
The pantry door is just to the left of the stove.  From their big open living area you can see the pantry door and the vent hood at the same time.  Those chairs in the background are the chairs Anna asked me to paint black/distressed.  I'll share a link to the chairs and the pantry door.
Their cabinets are a creamy beige and glazed. 
 The vent hood was nice, but much nicer now. 
The new painting really added a beautiful touch to their kitchen.
&  

Wednesday, June 13, 2018

PAINTING DINING CHAIRS BLACK FOR ANNA & DIEGO

PAINTING DINING CHAIRS BLACK FOR ANNA & DIEGO

Anna and Diego have a beautiful new home.
 They felt some of their furniture needed to be updated to fit with their new decor.
 They asked me to paint their breakfast room chairs.
A few years ago, I painted their kitchen island in their other home.
Anna asked me to paint her chairs similar to the island.
I painted them black and rubbed the paint off of the design.
Anna found this beautiful fabric and recovered the chair seats (herself).
I love the colors.  They look so good with her new black chairs.
Their table had a black base, so the chairs looked really good with that, too.
Chairs "before".

Thursday, June 7, 2018

HAND PAINTED ARTWORK ON MY STUDIO FLOOR

HAND PAINTED ARTWORK ON MY STUDIO FLOOR

This is my studio floor.
Years ago, when my studio was built, I hand painted artwork on my concrete floor.
Over the years it has gotten scratched and paint dripped on it.
I drew and hand painted the border artwork.  Used a stencil for the bird art.
It's all messed up now, but I still love it!

Monday, June 4, 2018

MORE PAINTING FOR LORI'S MASTER BATH ~ PAINTING A PICTURE FRAME, A MIRROR FRAME & AN ANTIQUE BLANKET CHEST TO MATCH HER NEW DECOR

MORE PAINTING FOR LORI'S MASTER BATH ~ PAINTING A PICTURE FRAME, A MIRROR FRAME & AN ANTIQUE BLANKET CHEST TO MATCH HER NEW DECOR

My last post was sharing pictures of Lori's bath cabinets.
(If you want to see the cabinets, I shared a link below.)
I painted an "antique silver" faux finish on all of the cabinets in her master bath.  Because she was changing her cabinets from brown stained to the "antique silver" faux finish she asked if I could paint the frame around one of her paintings so it would match her new colors.
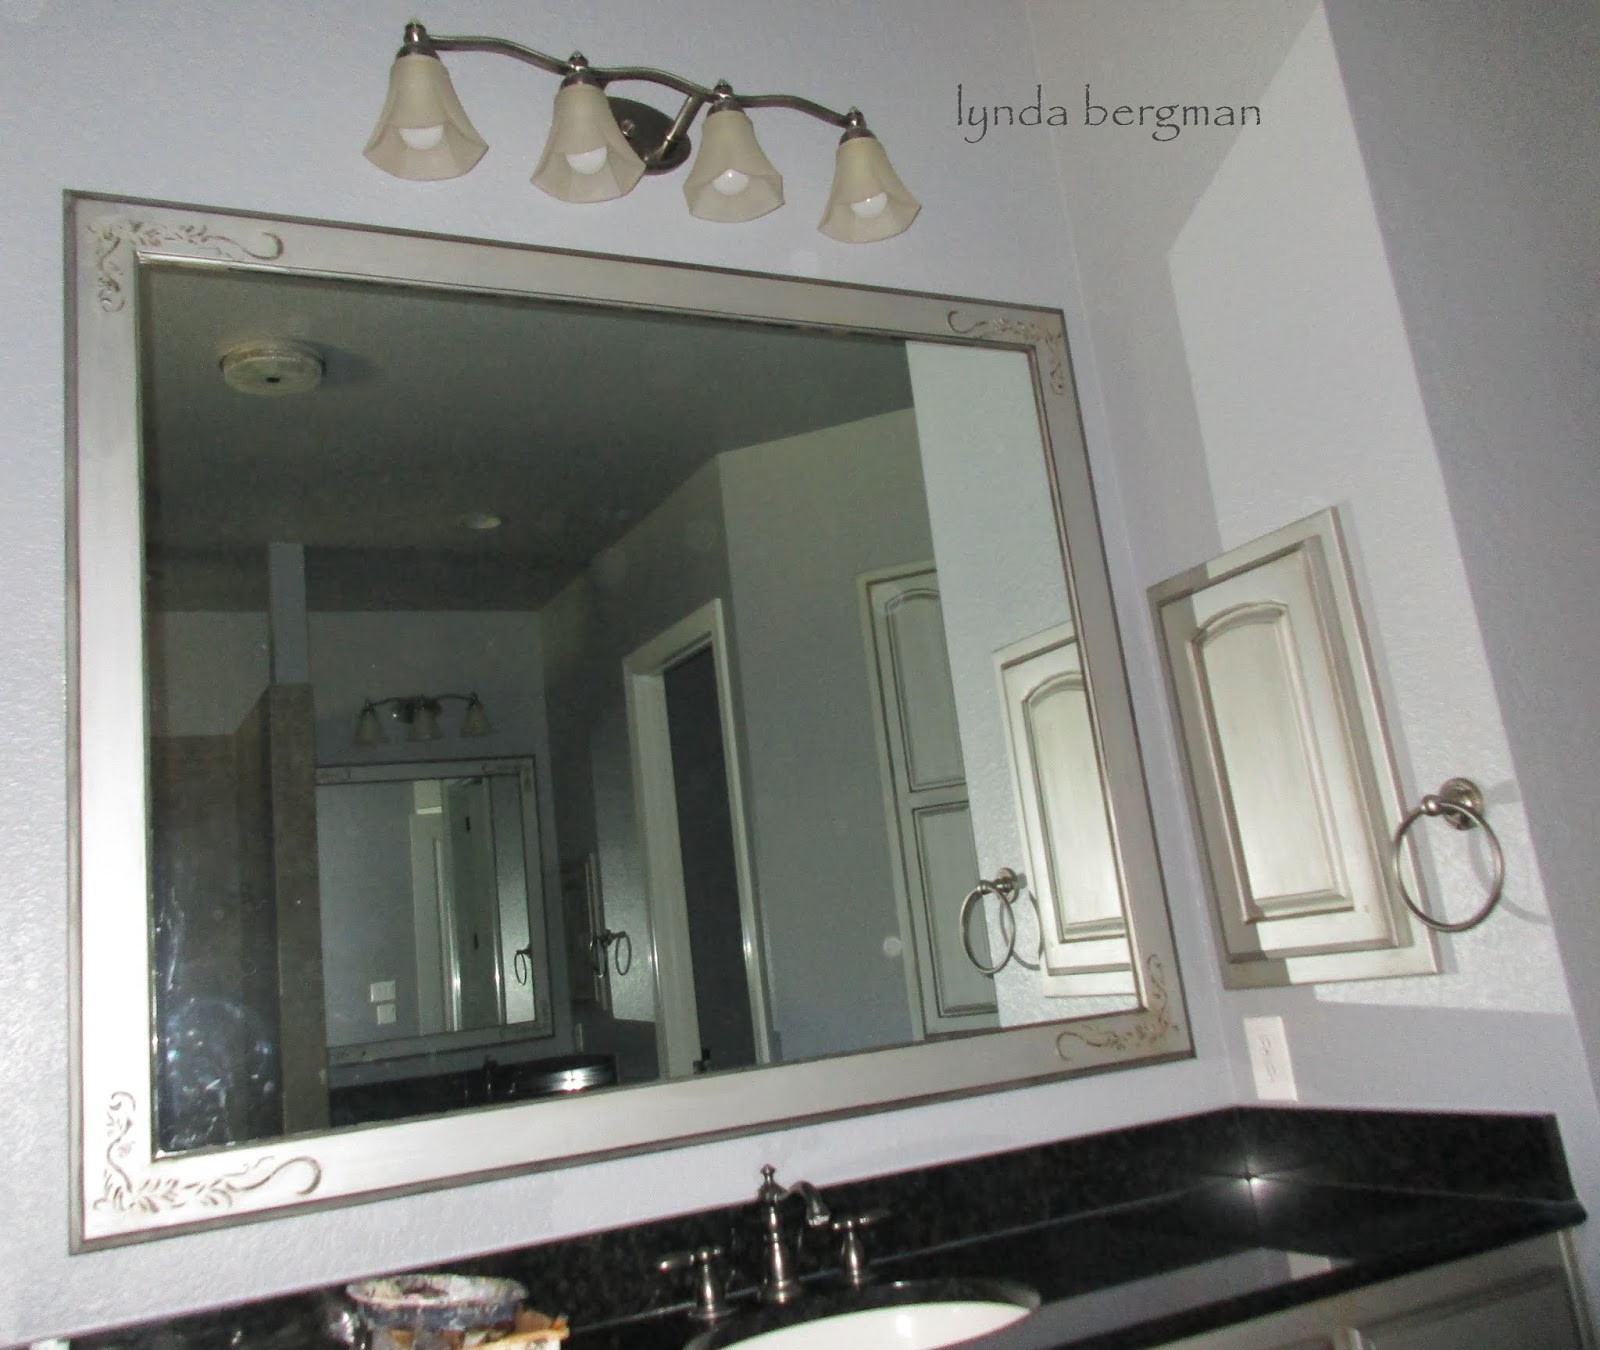
Also, she asked me to paint the frame around her mirror that goes in the master bath.
This painting goes in a niche just outside of her master bath.  I painted the frame black and swiped metallic silver over the trim.  It goes in a niche that I faux painted with metallic silver.
You can almost see the metallic reflection in this picture.
Remember, you need a light source for the metallics to reflect. 
This mirror goes in her master bath.
I painted and glazed the frame and painted a metallic pewter on the shell and scroll trim.
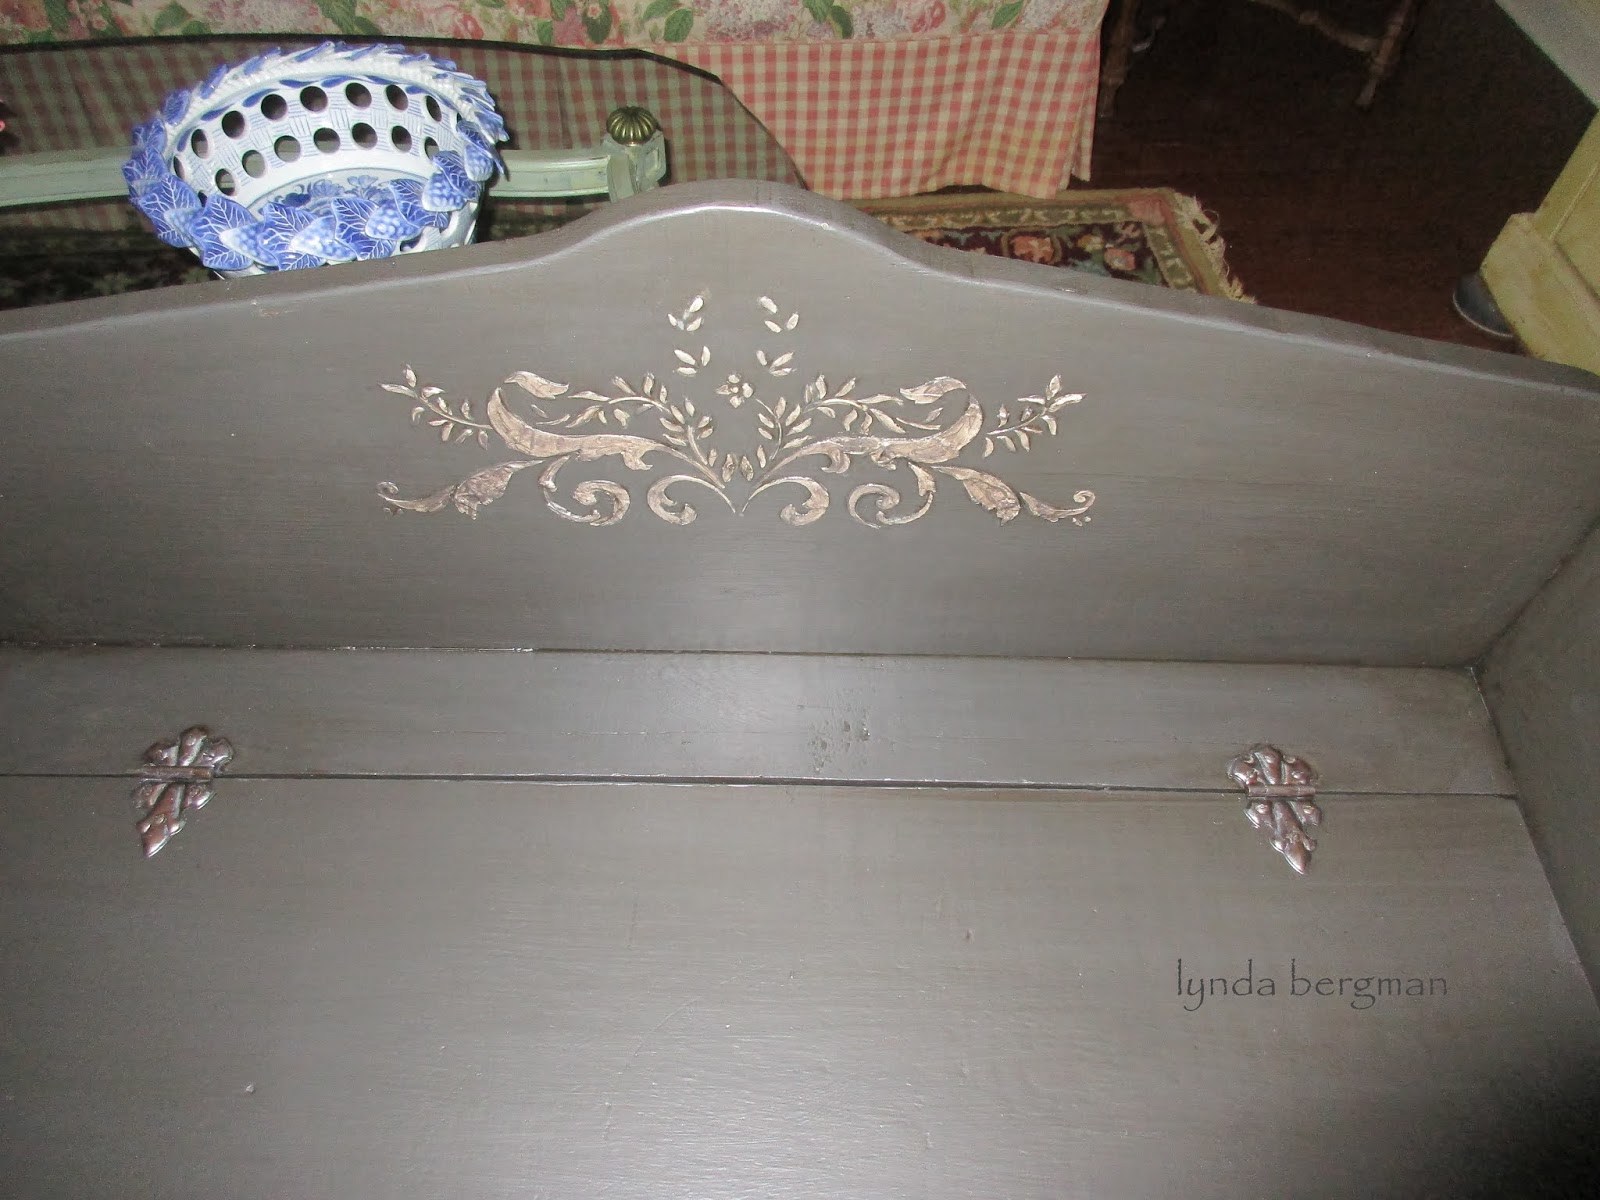
I painted this antique blanket chest that belonged to Lori's grandmother.  It goes near the newly painted master bath and is the same paint and technique that I painted on the mirror frame.  Those hinges are original.  They were a copper color.
I rubbed them with the metallic pewter to match the embossed design.
This bowl goes in the middle of Lori's breakfast table.  I painted it black and rubbed metallic champagne paint over it.  Nearby, there is a niche that I painted with the same metallic paint.
This is the picture frame before I painted it black and silver.
This is the mirror frame before I painted it dark and glazed.
On the blanket chest I embossed this design with a stencil that Lori chose.
Then painted the design with the metallic pewter.
Ready to go home!
~
LINK TO LORI'S NEWLY PAINTED BATH CABINETS:
PAINTING LORI'S BATH CABINETS TO AN "ANTIQUE SILVER" FAUX FINISH

Saturday, June 2, 2018

PAINTING LORI'S BATH CABINETS & MIRROR FRAMES TO A METALLIC "ANTIQUE SILVER" FAUX FINISH

PAINTING LORI'S BATH CABINETS & MIRROR FRAMES TO A METALLIC "ANTIQUE SILVER" FAUX FINISH

Lori was  making major decor changes to her master bedroom and bath.
In her bathroom her cabinets were stained brown and she wanted metallic silver.
I showed her a sample I painted of "antique silver" and she loved it.
The color I used to age/glaze the sample blended really well with her tile and floor.
Sample I showed her.  She did not want the crackling.  Only wanted glazing.
You can see the metallic paint in this picture.
Remember, metallics "reflect" so you have to have a light source.
I embossed a design on the mirror frames using a stencil and paste.
I "dry brush" painted the design black with a tiny brush.
 Brushed black around the inside and outside edges of the frame.
It really dressed up the mirror frames.
Linen cabinet.
There is a light directly in front of this cabinet, so you can really see the metallic silver paint.
This is my client, beautiful, sweet Lori.  I loved working with her.
She lives way out in the country.  I, especially, loved the drive to her home.  In her neighborhood I kept my car windows open and there were happy birds singing everywhere.
This is wonderful, funny Dolly.  She really loves un-rolling the toilet paper.
Dolly loves to sit in that window.  She jumps from the niche to that narrow ledge.
Wow!  That can't be easy!
This is "good boy" Charlie.  He loves and protects his mom.
Lori wanted me to paint her niche over the bathtub with the same metallic silver.
She found a stencil and wanted me to stencil with black inside the niche.  
The black really looked good with her granite and door handles.
Her door handles were silver.  I lightly sanded and painted black on either end.  Rubbed on and off black paint in the middle.  That helped to highlight the silver.
The black and silver handles looked really good as a finishing touch.
This is a niche right outside of the bathroom.  Lori is going to hang a chandelier in this one.
The chandelier will really make the metallic silver sparkle.
Thank you, Lori!

Saturday, May 26, 2018

PAINTING A NEW, FRESH LOOK FOR YOUR FRONT DOORS WITH SPAR VARNISH

PAINTING A NEW, FRESH LOOK FOR YOUR FRONT DOORS WITH SPAR VARNISH

Mary is getting her home ready to put on the market for sale.
 She asked me to make her beautiful front doors look better.  The finish was really dull, probably from all of the oak pollen that recently spread everywhere and just normal wear.  
Several years ago, I sealed these doors with oil based spar varnish.
You can find it at most paint stores.
It is a very hard drying sealer.  
I took a picture of before and after I applied the varnish.
Look at the dull finish just under the door handles.
The door panels have been varnished.  See the difference and how nice the varnish looks?
If you want to varnish your doors, first clean them really well. 
I applied the varnish with a paint brush. 
You do have to use paint thinner to clean your brushes.
 It's always best to ask your paint store how to use the spar varnish. 
They can give you pointers to make your job easier.
I think you will be very happy with the new, fresh look of your doors.