HomeMi CasaTutorialsInteriors etcMurals and ArtworkPainted Furniture

Wednesday, August 6, 2025

HAND PAINTING ARTWORK ON FOUR GROIN CEILINGS FOR PATTI'S NEW HOME & TUTORIAL

HAND PAINTING ARTWORK ON FOUR GROIN CEILINGS FOR  PATTI'S NEW HOME & TUTORIAL

     When Patti was building her BEAUTIFUL! new home I spent more than 3 months working there.  But, for about a year before that she was bringing me all sorts of things to paint for her new home.  She brought me tiles, furniture to be installed in baths, light fixtures, lots of different things, even her weathervane to go on top of her home. 
     This is the entry hall to Patti's very beautiful home.  There are four groin ceilings in a row surrounded by these amazing stone walls.  When she was building her new home she asked me to paint artwork on these four ceilings.  Using the same colors I painted a different pattern on each one. 
Aren't these light fixtures SPECTACULAR!!
The base coat on the ceilings was a light beigy brown.
The first thing I did was draw all of the scrollies and the center flower at the base of each light fixture.  Next, I used a small brush and painted everything.  Then, I used a tiny brush and a very dark blackie brown paint and outlined all of the artwork.  When I was finished with alllllll of the artwork I brushed on and wiped off with a rag a very light brown aging glaze.  The glaze was a really nice finishing touch.  It tied everything together and looked so good with her darkly stained pine wood floors and stone walls.
                 It was lots of hard work, but I'm very proud of how everything looks now.
                 Patti has such great taste and it really shows in this wonderful home.
                                                              THANK YOU, PATTI!!
Original Post January 15, 2013

Tuesday, July 22, 2025

HOW TO BUILD & INSTALL A PLATE RACK FOR A CABINET -TUTORIAL

VISIT MY NEW
LYNDA BERGMAN DIY BLOG

This tutorial is to show you how I built a few plate racks to install inside the cabinet spaces of kitchen cabinets that I have painted.  A plate rack really adds another dimension to your kitchen and can display your decorative plates or your every day plates.
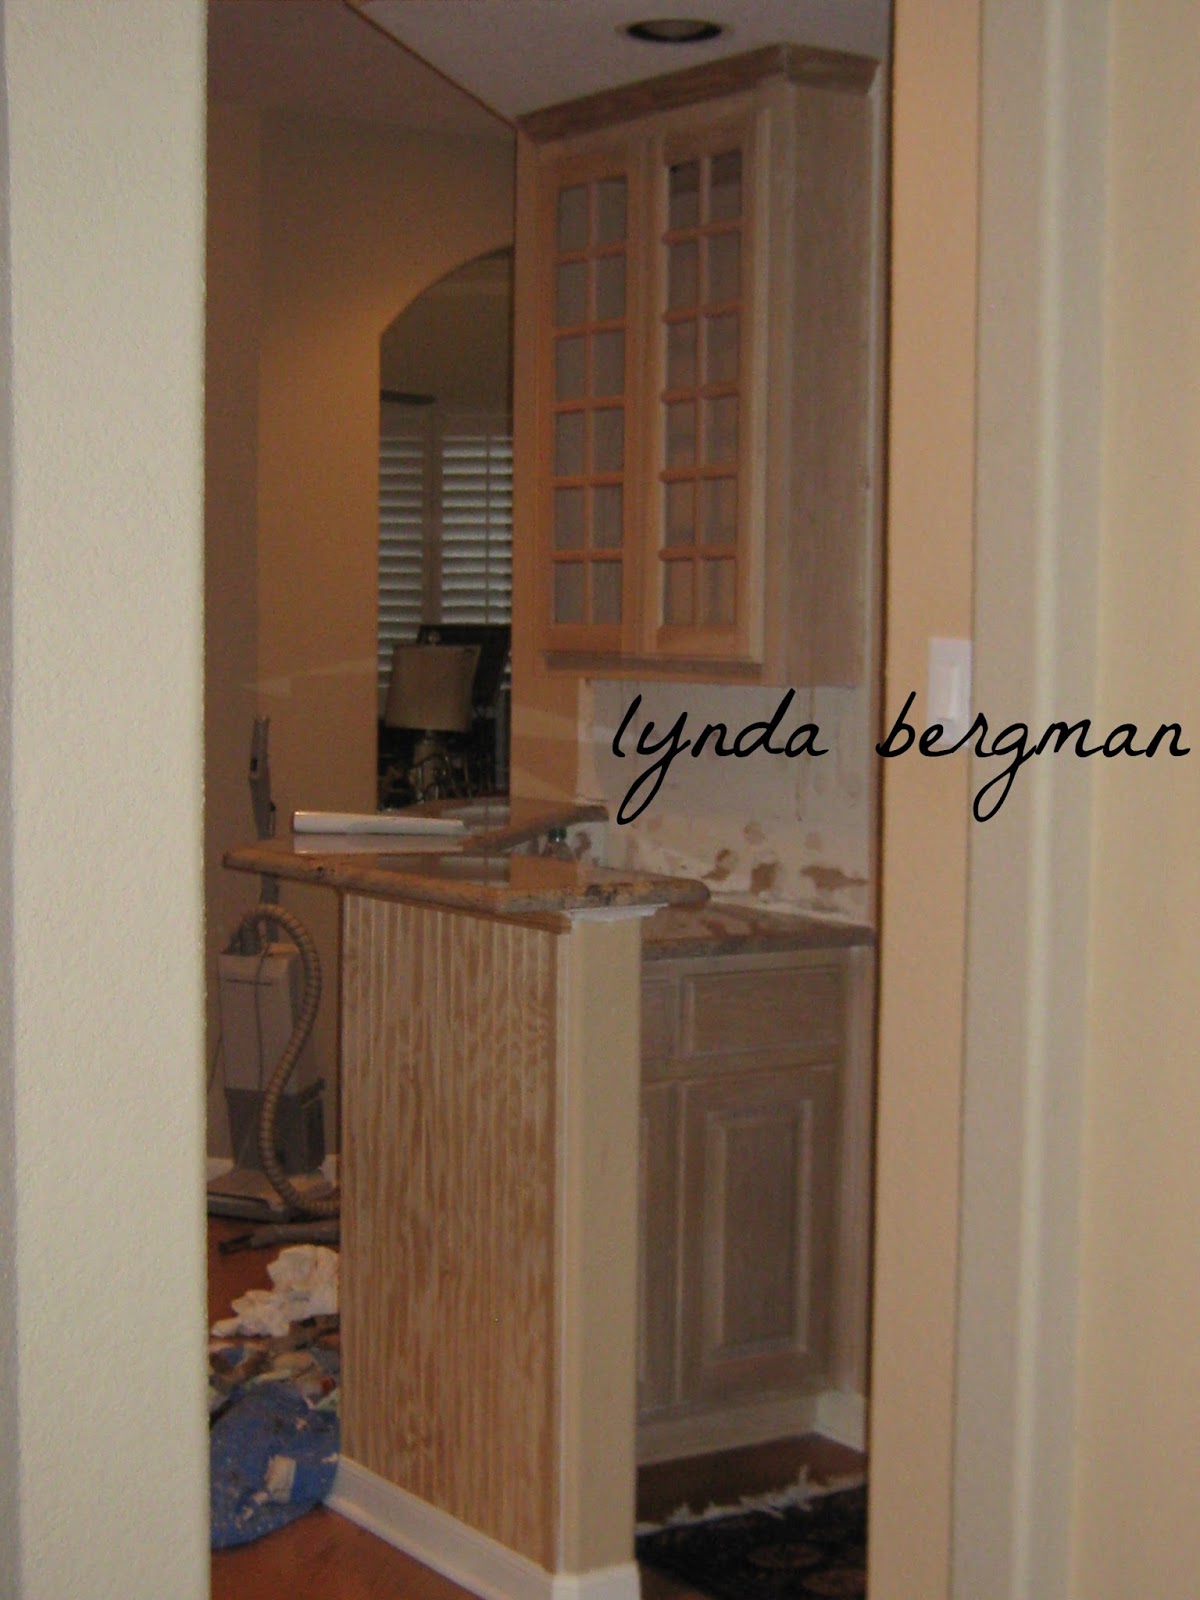
In this kitchen my clients looked around to figure out where the open cabinet and plate rack would look the best.  Then, they removed the two cabinet doors that were on this space.  They added their cookbooks on the top shelf.
After they removed the doors there were holes where the screws had been.  You can fill those in.  If they need to be touched up, use a litte stain or craft paint that matches your cabinet finish.  But, I was there to paint one of my special aged finishes on the cabinets so I was able to fill in and disguise the holes with paint and stain.  Their cabinets were that pickled/white washed finish before I painted them.
If you don't want to repaint your whole kitchen, I think it would look really nice and decorative to paint the whole inside of the open area and plate rack an accent color.  A color that matches your decor.
First, I went to Lowe's and got trim that was about  l/8" x 1 1/2" wide and dowels that were about 3/8".  These trim pieces come in different lengths. They're usually in the section where you find other door and baseboard trim.  I measured the inside of the cabinet to see how long the top and bottom pieces of the plate rack should be.  I cut four pieces the same length.  The two racks need two of these cut pieces each, one for the top and one for the bottom to hold the dowels.  Then, I taped them together before I drilled the holes for the dowels.  You need all of those holes to be exactly the same so the dowels will be vertically straight and evenly spaced.  I drilled a hole every 2".  But, before drilling you need to go with the measurements of your cabinet space.  The space between your holes drilled may be a little more or a little less than my 2".
Oh, and when I measured the width and height of the inside of the cabinet I made sure I was 1/8" to 1/4" shorter so the plate rack would slide in, easily.
You need to measure the size of your dowel so you'll know which size drill bit you will need to drill your holes.  When I had everything cut exactly the same, I used Elmer's Wood Glue and pushed or gently hammered the dowels into the holes on the trim piece.
It's best to paint everything before you install these racks or you'll have a hard time getting your brush and hand in between all of those spindles.  It's just a neater, cleaner job painting before you install.
After painting everything I got small finish nails and hammered/got them started in the bottom and top trim pieces so it would be easier to hammer them into place.  Before I hammered them to the cabinet I put Elmer's Wood Glue all over the top and bottom trim pieces where they would be touching the top and the bottom of the cabinet.  Wood glue makes a much tighter bond than nails only.
Before the final step of hammering them into place I measured where I wanted to place the two racks and the distance between them was important.  So, I measured 1 3/4" back from the front of the cabinet because I wanted the front rack to be placed there.  I penciled a line so the rack would be perfectly straight.  Then, I measured 5" from the back where the front rack would be nailed and that's where I drew my next line.  My lines were drawn where the front of each rack would be.  You have to draw these lines on the top and bottom of the cabinet opening, so everything will be perfectly straight.
THEN, I hammered them into place.

This is a free standing plate rack that I built and painted artwork on sides and top.
First, I built the box (like the inside of a cabinet).  I attached four drawer pulls for the feet.  Then, I put it together just like the instructions above.
This would be such a nice gift for someone.  You could stain the wood or you could paint and crackle. You could stencil all over it, decoupage all over it.  
Paint all one color or different coordinating colors to fit your or someone's decor.
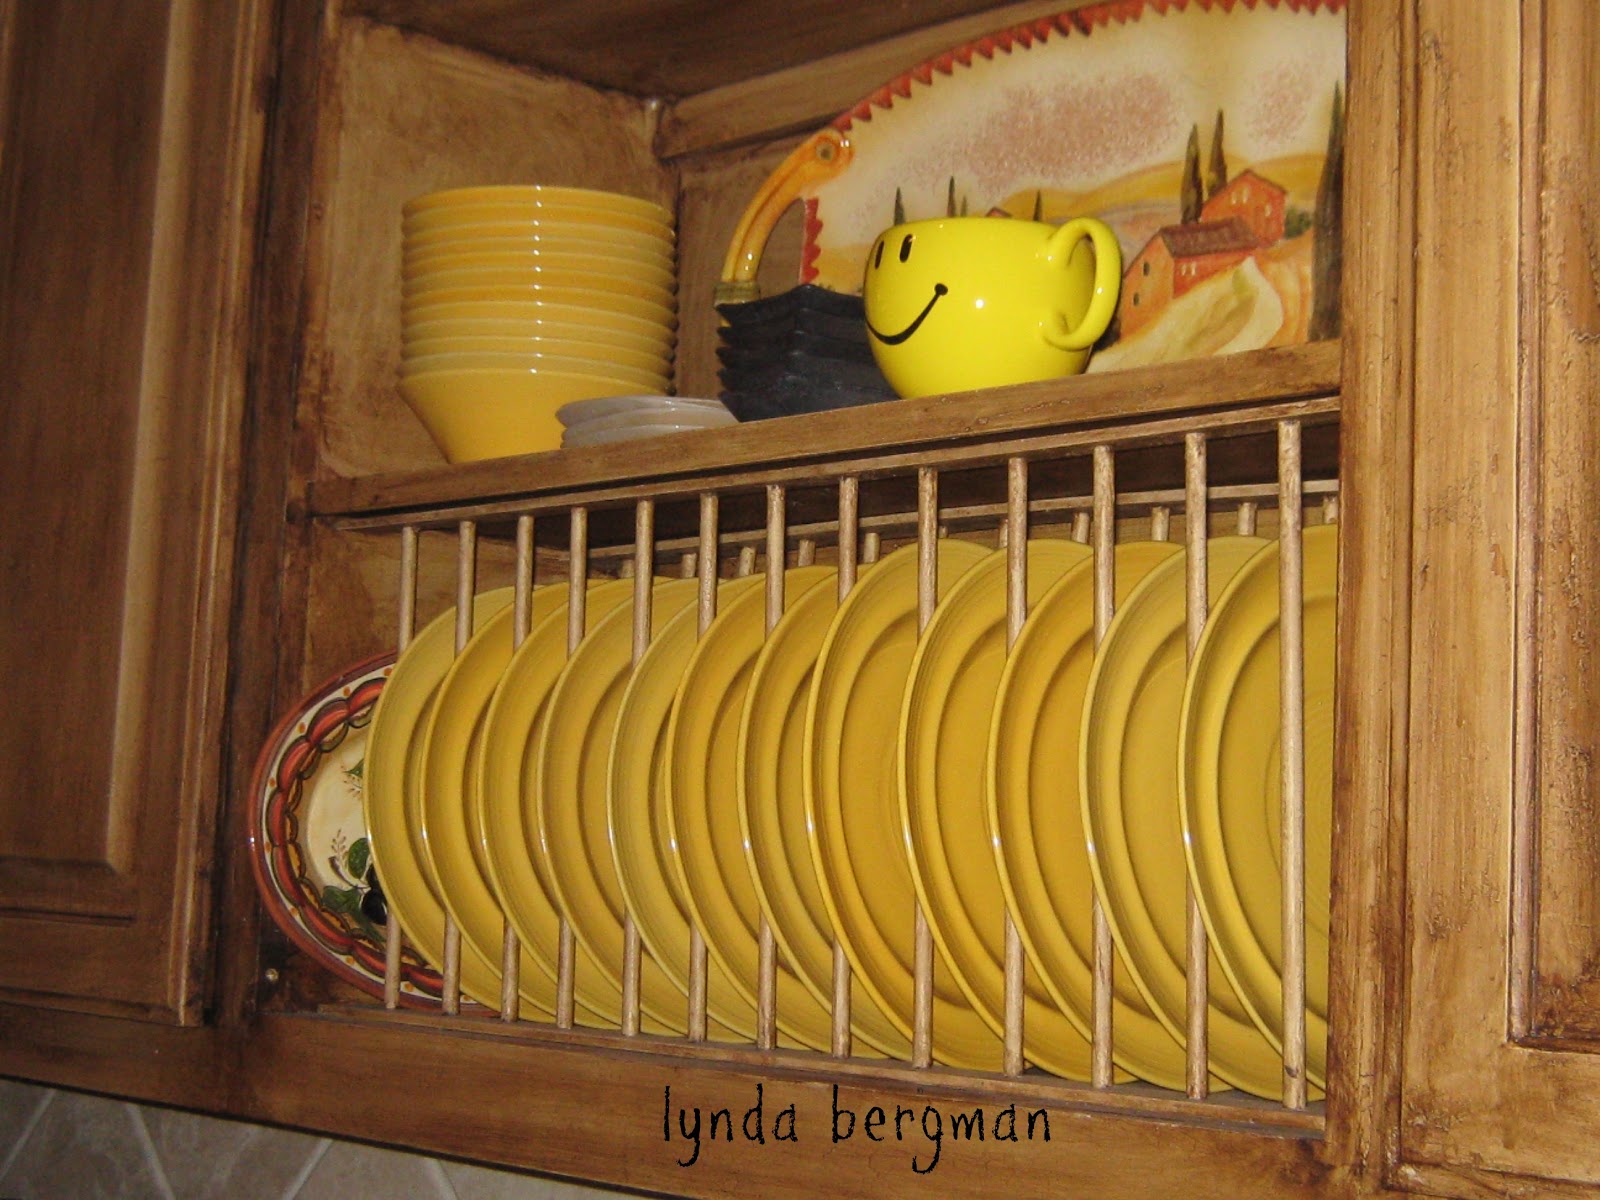
Just a suggestion:  when you put your plates in the plate rack, if you put them straight in that's ok and you can get one more plate in it.  But, if you have decorative dishes and want them to show, angle one spindle over in the back when you're putting the plates in and that little angle will show off your dishes. If you angle there will be space for one less plate.  But, the angle looks really good.
~
HAVE FUN BUILDING YOUR PLATE RACK!!
~
VISIT MY NEW
Original Post 12/16/12

Sunday, May 4, 2025

HOW TO HAND PAINT LIGHT FIXTURES & CHANDELIERS

HOW TO HAND PAINT LIGHT FIXTURES & CHANDELIERS

This chandelier was shiny brass and pewter.
My client asked me to paint it to a rusty, old finish.  
His decor was country french.
VISIT MY
~
FOR MY LATEST POST ABOUT PAINTING LIGHT FIXTURES & CHANDELIERS
&
OTHER HOME DECORATING PROJECTS AND TUTORIALS
12/31/17

Friday, February 28, 2025

PAINTING GAYLE'S MANTEL FROM PICKLED, WHITE WASHED OAK TO BLACK DISTRESSED

VISIT MY
LYNDA BERGMAN DIY BLOG
~
(UPDATE:  OMGoodness!!  I was working at Gayle's this morning and she told me that she had played golf yesterday and got a hole-in-one!!  Her golf friends were cheering and when she got home her husband had already started celebrating!! and had banners and stuff around congratulating her. WOW!  Congratulations, Gayle!!)  
     Gayle loves decorating her home.  A while back I painted those peach walls.  Her dining room is attached to this living room and has peach walls, also. I asked if we could paint her ceiling a peachy red to blend with the walls and she let me paint that, too.  I don't have photos of her dining room ceiling, but will take some next week because I'm working there again starting Monday.
     Her mantel in her living room was a pickled oak finish.  One of us mentioned the black and I knew it would look really good with all of her peach decor and her black rug and furniture.  (well, I just talked to Gayle and she said it was my idea to paint her mantel black.  She said I was there painting something else and I told her we just had to paint the mantel black! and she agreed and let me paint it and she just said that she loves the way it looks now.)
Doesn't this room look soooo cozy!!
Painting the mantel black made such a dramatic difference to the room.
First, I primed the mantel.  Then, I painted it with a black oil based paint and rubbed the edges with a rag so the brown base coat color would show through, thus looking a bit distressed.
Then, I sealed it with two coats of an oil based sealer.
I love the way this turned out and it looks so beautiful in her already beautiful living room.
This is Gayle's dining room ceiling.  The peachy red adds a nice touch to the dining room and ties in so nicely with the living room decor.
Original Post 1/27/13
~
VISIT MY 

Wednesday, February 5, 2025

HAND PAINTING ARTWORK ON ANTIQUE CEILING TINS

HAND PAINTING ARTWORK ON ANTIQUE CEILING TINS

This is an old metal ceiling tin I found at an antique salvage store.
As soon as I saw it I knew I wanted to paint it.
It had some rust on it.  I washed it well and primed it hoping the rust would not come back through the paint.  If a little rust came back through the paint that would look good, too.
 After priming I painted the artwork on the corners.
Then, painted an antiquing glaze on top of all of the paint.
When my client saw the ceiling tin above she wanted me to paint two of her antique ceiling tins. She had just built a new home out in the country and was still having fun decorating.  There was a little rust on these and I did not prime them.  I swiped paint over the whole tin.  When I saw that scrollie design at the bottom, I knew they would be really beautiful as a vase.  
So, I painted the vases with flowers right over the embossed design.
I used her colors and she hung them over her bed.
Later when I visited I knew they were in the perfect place. 
 So pretty!!
Original Post 11/9/16