HomeMi CasaTutorialsInteriors etcMurals and ArtworkPainted Furniture

Sunday, May 17, 2015

FROM BATH CABINET TO A HAND PAINTED ARTSY BIRD CABINET & TUTORIAL

FROM BATH CABINET TO A HAND PAINTED ARTSY BIRD CABINET & TUTORIAL

In the home where I was working my clients happened to be remodeling one of their bathrooms.  They were replacing their cabinets and put them in the garage to be hauled off.  One of the cabinets was a linen cabinet that hung over the commode and when I saw it in the garage I just knew I could do something special with it.
I bet lots of you have this same cabinet over your commode with the opening on the bottom for tissues, towels, etc.  I asked a carpenter to help me attach the feet.   
I asked him to turn it upside down with the opening at the top.  Then I found these feet at Lowes.  Actually, they are fence post finials.  I asked him to attach these feet to the cabinet.  The little wrought iron corner pieces I found at Hobby Lobby...LOVE their 40% off coupons!!
I added the new handles, too.
 I started painting it.  I primed and painted it a soft blue.  I painted all of the artwork on front and sides.  Finally, I aged it with an antiquing glaze and sealed it with a clear coat.
I painted the inside an off white that matched the other artwork.  
Painted little metallic dots on the front of the shelves. 
 Painted metallic copper/bronze around the feet and a couple of other places on the cabinet.
I really love how this cabinet turned out.
One of these days I think I will get to see it again in a client's home.
I do hope so!!
Because I forgot to take a "before" photo of the original linen cabinet,
 I found this on Google to show you.  I wanted you to see what I started with.
You can do it, too!
(This is a repost from January 17, 2013)

Friday, May 8, 2015

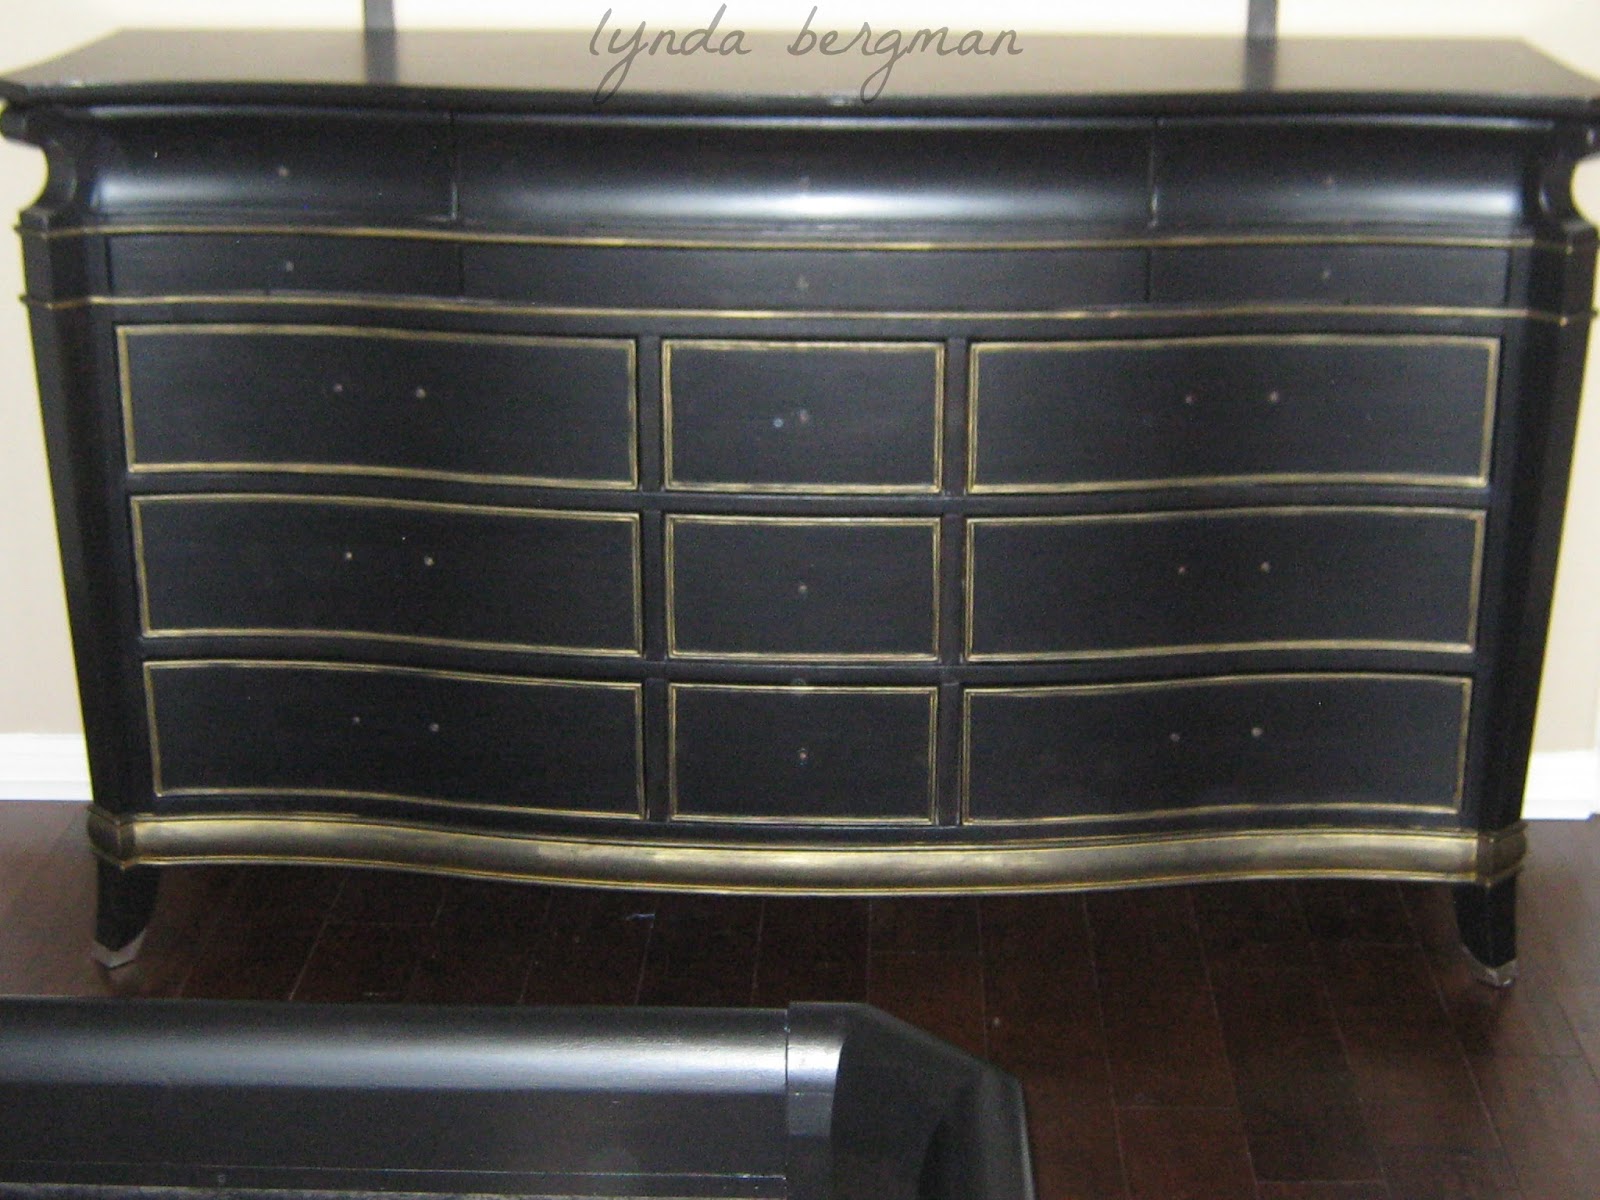
PAINTING JACKIE'S BEDROOM FURNITURE BLACK WITH METALLIC GOLD TRIM

Jackie's daughter just moved away to college.
So, Jackie totally redecorated her daughter's bedroom.  She had hardwood floors installed.  Then, she asked if I would paint her brown stained furniture black and gold.  The furniture was really beautiful, but Jackie wanted it black and gold.
So, I primed, painted, trimmed with metallic gold and sealed everything with two coats of clear sealer.
Jackie is going to paint the walls.
She's looking for just the right new hardware to put on her newly painted furniture.
There is a mirror for the dresser and I painted it, too.
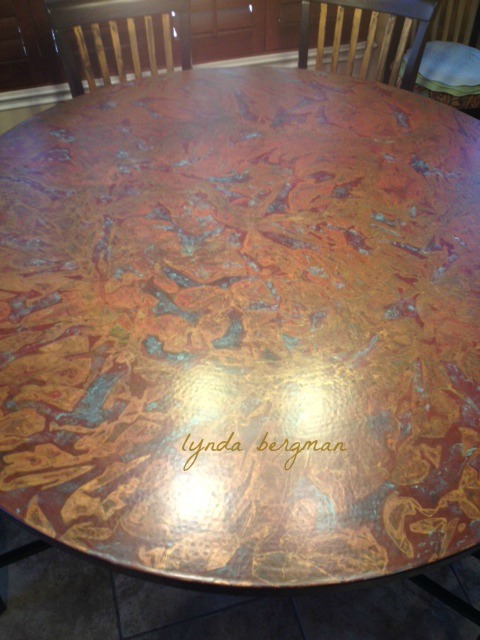
Last summer Jackie purchased this copper table for her breakfast room.  She chose this particular one because it had so much patina on it.  Since last summer, as Jackie washed the table the patina kept coming off.  She tried a saline solution and it did patina the copper again, but every time she cleaned it the patina would still come off.  So, she asked me to use some paint and paint the patina on and seal it so she could clean it.  There was still some of the original patina on the other side of the table and I just copied it with paint color and patterns.  
Also, she wanted it to look similar to her vent-a-hood that I painted for her last summer.
Here is a link to that post:
While I was painting her daughter's furniture, she asked if I would touch up a spot on her tuscan style kitchen cabinets that I painted for her.  She had new granite installed and they nicked a little spot.
It was easy to touch up.
This is a link to pictures of her kitchen:
This is the bedroom furniture "before".  See, it's really beautiful with the stained wood finish.
I always love working with Jackie. 
 She loves decorating her home and it really is an elegant show home.

Friday, April 17, 2015

PAINTING A GLAZED DARK FINISH ON KATHRYN & SEAN'S KITCHEN CABINETS & STAIR RAILINGS & LINK TO PAINT COLORS & TECHNIQUE EBOOK

 PAINTING A GLAZED DARK FINISH ON KATHRYN & SEAN'S KITCHEN CABINETS & STAIR RAILINGS & LINK TO PAINT COLORS & TECHNIQUE EBOOK

Kathryn and Sean asked me to paint their kitchen cabinets and stair railings.
Both were that pickled/whitewashed oak.  
I showed them some samples and this finish is the one they chose for the kitchen cabinets.
It's several layers of paint and sealer.
This finish looked really good with their granite and backsplash tiles.
Their floors were stained concrete and the cabinet finish looked great with the flooring, too.
My hands get a little messy with these cabinet finishes.  But, they clean up just fine.
They were very happy with the way the kitchen turned out.
Then, I showed them a couple of samples for the stair railings.  They chose the one on the left.
Sean had stained his front door a really dark color and they wanted the railings to be dark, too.
The dark railings look so nice, now.  
Doesn't that look nice!
The "before" pictures are below.  The paint made such a difference.
One of their friends stained their concrete floors and put this design in the entry.  
It's Fiesta time in San Antonio.  You can see Kathryn's Fiesta wreath on the front door with lots of brightly colored ribbons.  Fiesta is a really big thing here.  It's fun! fun! fun! for several days.
Yesterday, I saw a lady with each one of her fingernails painted a different color. 
FIESTA!!
Stair railing "before".
Kitchen cabinets "before".

(original post 4/17/15) 

Here is a link to my new instructional eBook with paint colors and technique to achieve this finish.

Monday, April 13, 2015

BEAUTIFUL COUNTRY HOME WHERE I'VE BEEN PAINTING SPECIAL DISTRESSED FINISHES ON ALL OF THE CABINETS

BEAUTIFUL COUNTRY HOME WHERE I'VE BEEN PAINTING SPECIAL DISTRESSED FINISHES ON ALL OF THE CABINETS

Finally, I have organized enough pictures that I can show you the wonderful house where I've been working.
From the open kitchen, you look into this huge room   I'm not sure if they call it a living room or a great room.  Up on the right, is the open hallway leading to bedrooms.  I'm pretty sure the railings will be wrought iron.  It's open on both sides and it was open (no railing) while I was going back and forth working on the bath cabinets in each bedroom.  It was a little scary walking on that narrow, open breezeway.
This is the other end of the great room.  The open kitchen.
I love the way they made the cabinets different heights.  
Looking from the kitchen, this is the dining room.  And, that is the ceiling medallion that I painted and shared with you, earlier.
The kitchen with the brown primer.
I painted a white distressed finish over this color.
I believe they left the ceiling the natural wood color.  Not sure if they even sealed it.
This flooring is "to die for"!!
It has gray brown tones and each board is 9" wide.  It truly looks like old barn wood.
Doors.
Alex
This house is around 6,000 sq. ft. of beautiful.
Those garage doors are stained wood.
Several times, I tried to get good pictures of the copper on top of the house.
Real copper is covering the top of the chimney stack at the very top of the house.
And, there are two of those little dormer windows on either side of the very high entry.  There is a 4" or 6" strip of copper around the top of the little dormers.  The copper will patina with age.
Next post, I'll show you more of the cabinets I painted.
Isn't this a beautiful home!!

Wednesday, April 1, 2015

MY NEW VISE-GRIPS ~ MY NEWEST FAVORITE TOOL

MY NEW VISE-GRIPS ~ MY NEWEST FAVORITE TOOL

I was mowing my yard and the muffler on my lawn mower started smoking.  It was really rusty.  I tried to remove the muffler so I could take it to Lowe's by my house and get the exact same one.
I tried and tried to take that rusty muffler off and it wouldn't budge.
At Lowe's I found the replacement muffler and asked the guys how I could remove the old rusty one. 
They said I needed vise-grips.  
Some of them had a smaller width opening and this one is really large so it could fit my muffler.  It can also be adjusted to fit something smaller.  They were under 20.00.
I came home and used those vise-grips and could not believe how easy it was.  You punch that round silver button to adjust the size and then just turn whatever you're trying to loosen.  
I think this will be one of my favorite tools.  I bet I can even open jars with them.
Maybe you already knew about vise grips.  
But, I wanted to share this great find with you, just in case.

Tuesday, March 31, 2015

HAND PAINTING ART ~ A BEACH SCENE MURAL FOR A NURSERY & PAINTING A PALM TREE TUTORIAL

HAND PAINTING ART ~ A BEACH SCENE MURAL FOR A NURSERY & PAINTING A PALM TREE TUTORIAL

My client asked me to paint an ocean beach scene for her new baby boy.
His name was Jackson.
  I love his name!
She asked me paint the ocean on three walls.
And, paint a sky ceiling.
And, a lighthouse.
A place to sit out of the sun.
PALM TREE TUTORIAL
Palm trees are really easy to paint.
Just draw and paint the trunk.
Draw a line for the middle of the palm tree fronds.  Place them where you want them to be.
Then, use a flat artist brush and paint lots of curved fronds.
Paint them larger at the base of the tree and smaller toward the end.

Saturday, March 28, 2015

PAINTING GAYLE'S MANTEL FROM PICKLED/WHITE WASHED OAK TO BLACK DISTRESSED

PAINTING GAYLE'S MANTEL FROM PICKLED/WHITE WASHED OAK TO BLACK DISTRESSED

Gayle has such a beautiful home.
A few years back when I was painting for her, I suggested that she let me paint her pickled/white washed oak mantel black and distressed.
 I knew it would be so beautiful with her peaches and off white colors around the room.
She said "ok", so here is the finished mantel.

Isn't her living room just wonderful!!
To visit the original post and more pictures and information, visit this link:
PAINTING GAYLE'S MANTEL
Each week this is one of my most viewed posts from Internet searches and Pinterest.